How to Connect Shimano Wireless Rear Derailleurs to a PC
Shimano's full wireless rear derailleurs feature an on-board battery, and therefore do not require an easily accessible SD300 port. Software updates and configuration happen through the E-Tube Project mobile app.
Even so, you can in fact connect these wireless rear derailleurs to a Windows computer using the SM-PCE02 linkage device.
Why connect a wireless derailleur to a computer?
So, considering that you can configure these through the mobile app and even update the firmware that way, why connect one of these derailleurs to a Windows computer?
Well, there are a couple of things E-Tube Project Professional (V5) does that cannot be done using the mobile app:
- Run diagnostics; hardware faults, error checking
- Restore components (corrupt firmware)
- Change the cage setting (GS to SGS)
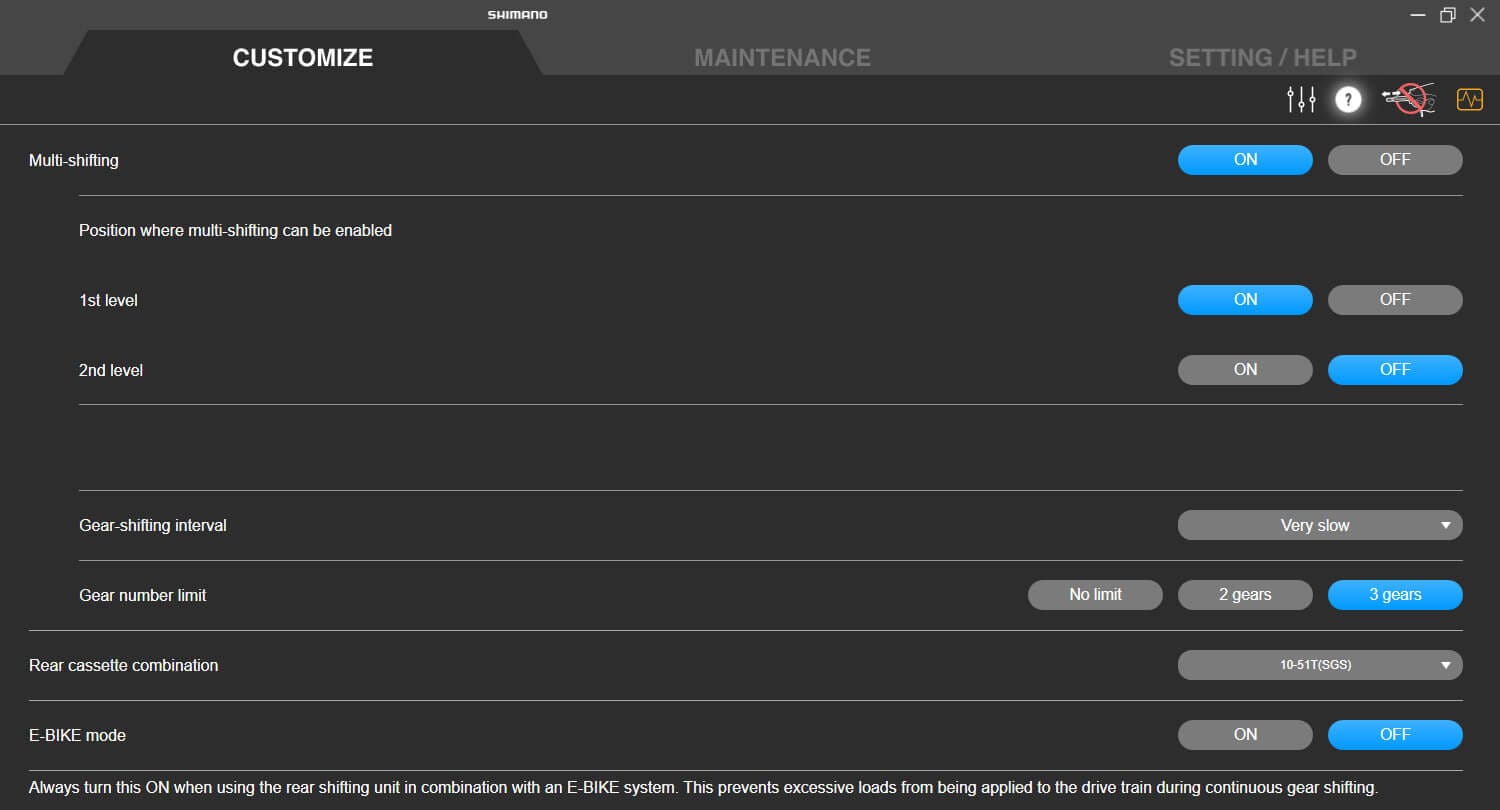
- Enable/disable E-Bike mode
Which derailleurs can be connected?
Every 1x12 wireless MTB derailleur and 1x12 gravel derailleur that uses the BT-DN320 derailleur battery can be connected to the SM-PCE02.
At the time of writing, those are:
- XTR RD-M9250-GS / RD-M9250-SGS
- Deore XT RD-M8250-GS / RD-M8250-SGS
- Deore RD-M6250-SGS
- GRX 8 RD-RX827-SGS
- GRX 7 RD-RX717-SGS
Locate the hidden SD300 port
Looking at the derailleurs, there's no easily accessible SD300 port. But just because you can't see it, that doesn't mean it's not there. The port is hidden underneath a small cover. Here's what you do.
Grab your tools
You don't need a lot of tools, just two, really:
- A size 2 hex key
- Shimano's TL-EW300 cable tool
Remove the cover
To locate the cover mounting screw, look at the derailleur from behind. You should see the B-screw, and right next to it, slightly smaller and recessed, the cover mounting screw.
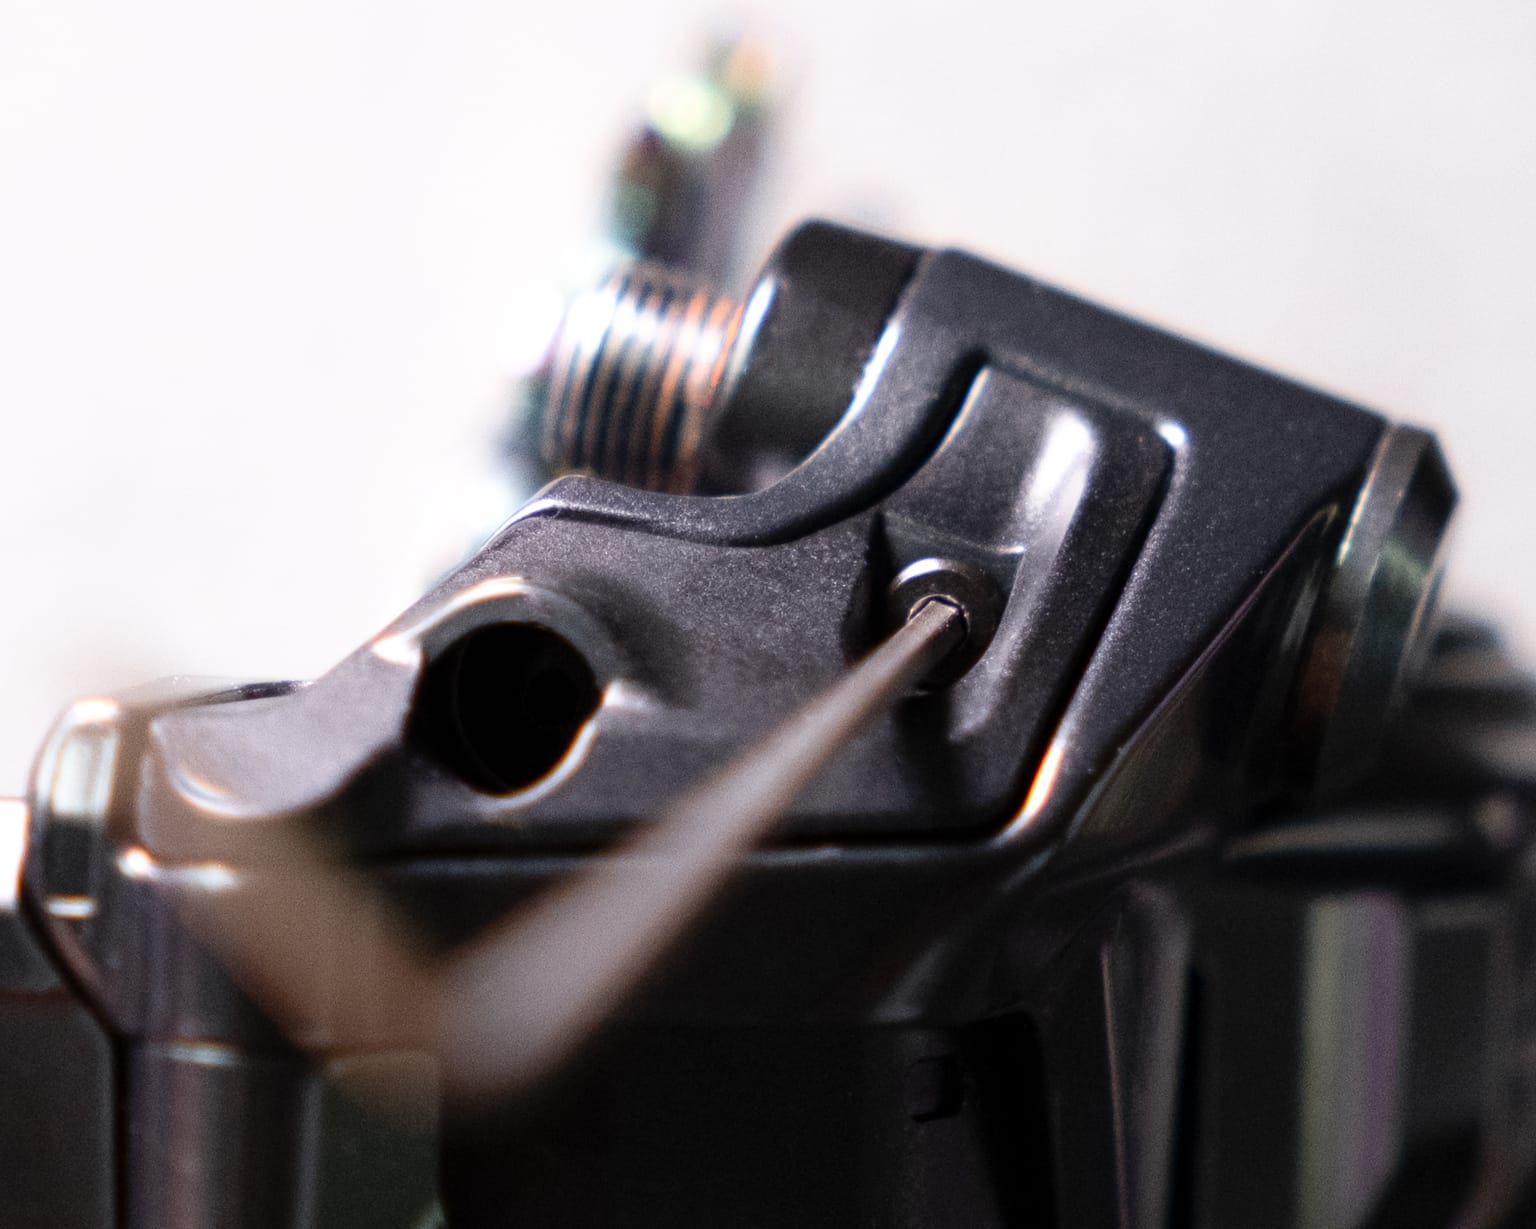
Take out the screw, and remove the cover. It should come right off, without any force required.
Slide up the rubber port cover
With the SD300 wire now visible, you need to slide up the rubber port/wire cover.
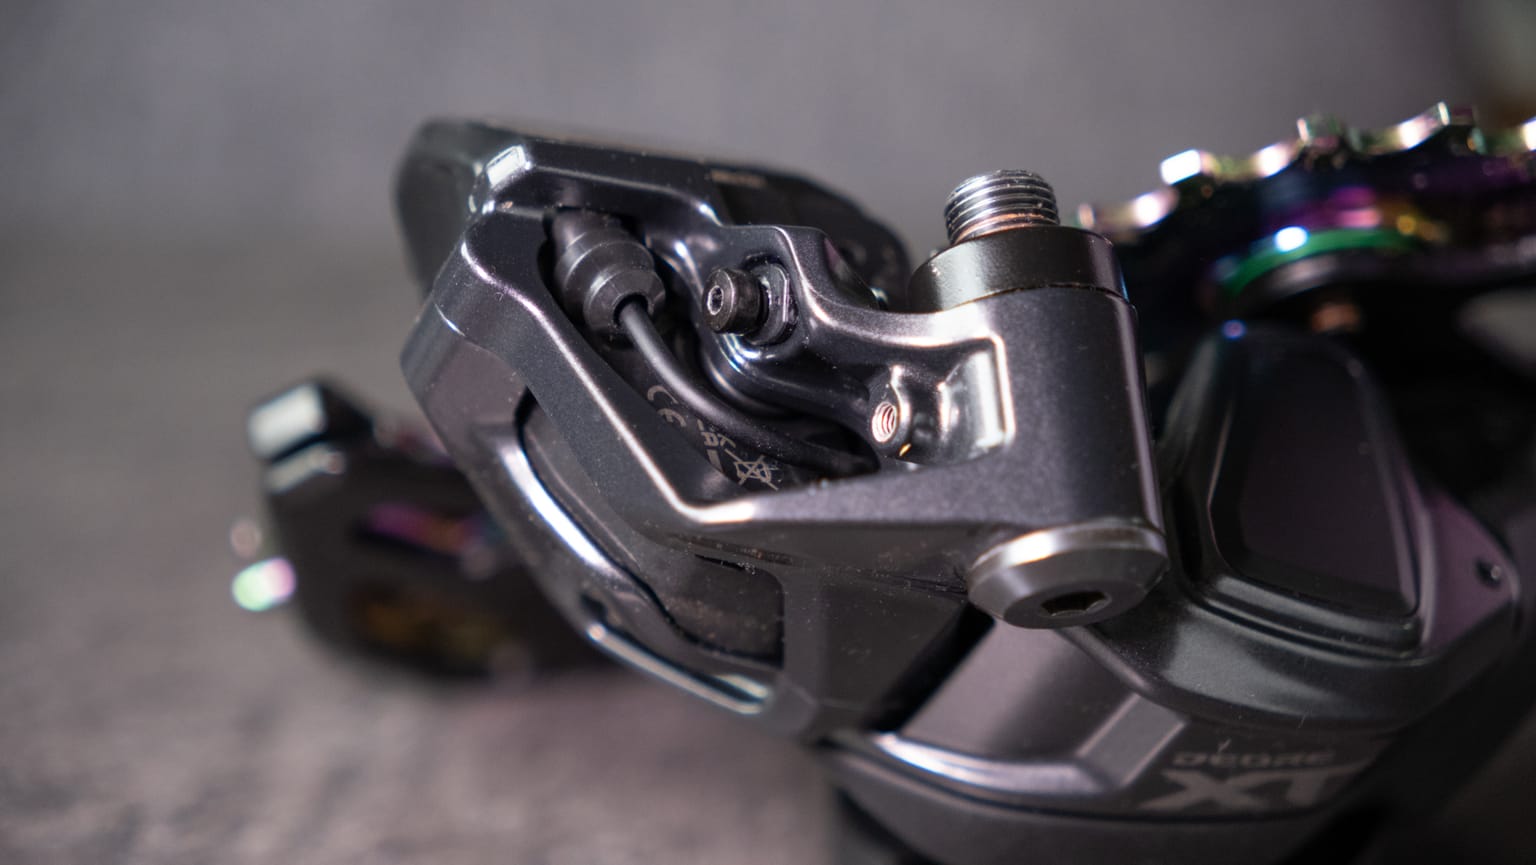
Quick tip Getting the port cover past the B-screw can be a bit of a challenge. On my RD-M8250-GS, it was simply in the way. The fix? Tighten or screw in the B-screw completely. That'll give you plenty of room to slide up the cover.
Disconnect the wire
With the rubber cover out of the way, take your TL-EW300 cable tool and use that to remove the SD300 wire.
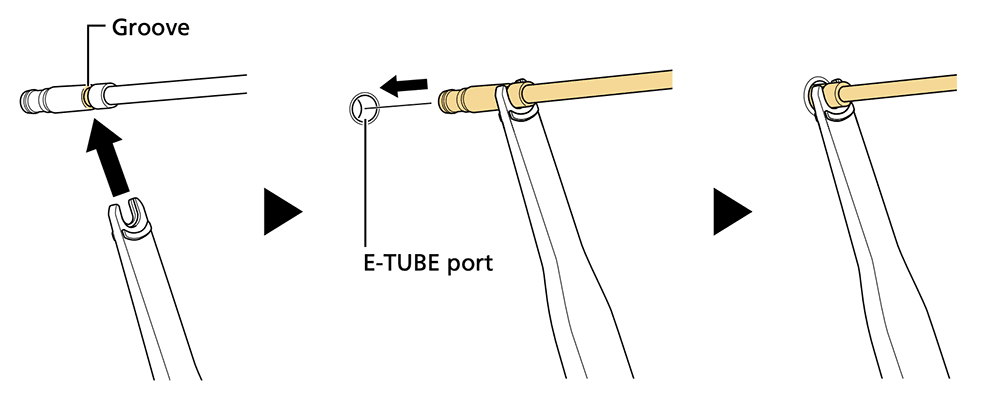
Connect the SM-PCE02
That's it! You can now connect the SM-PCE02 to the SD300 port.
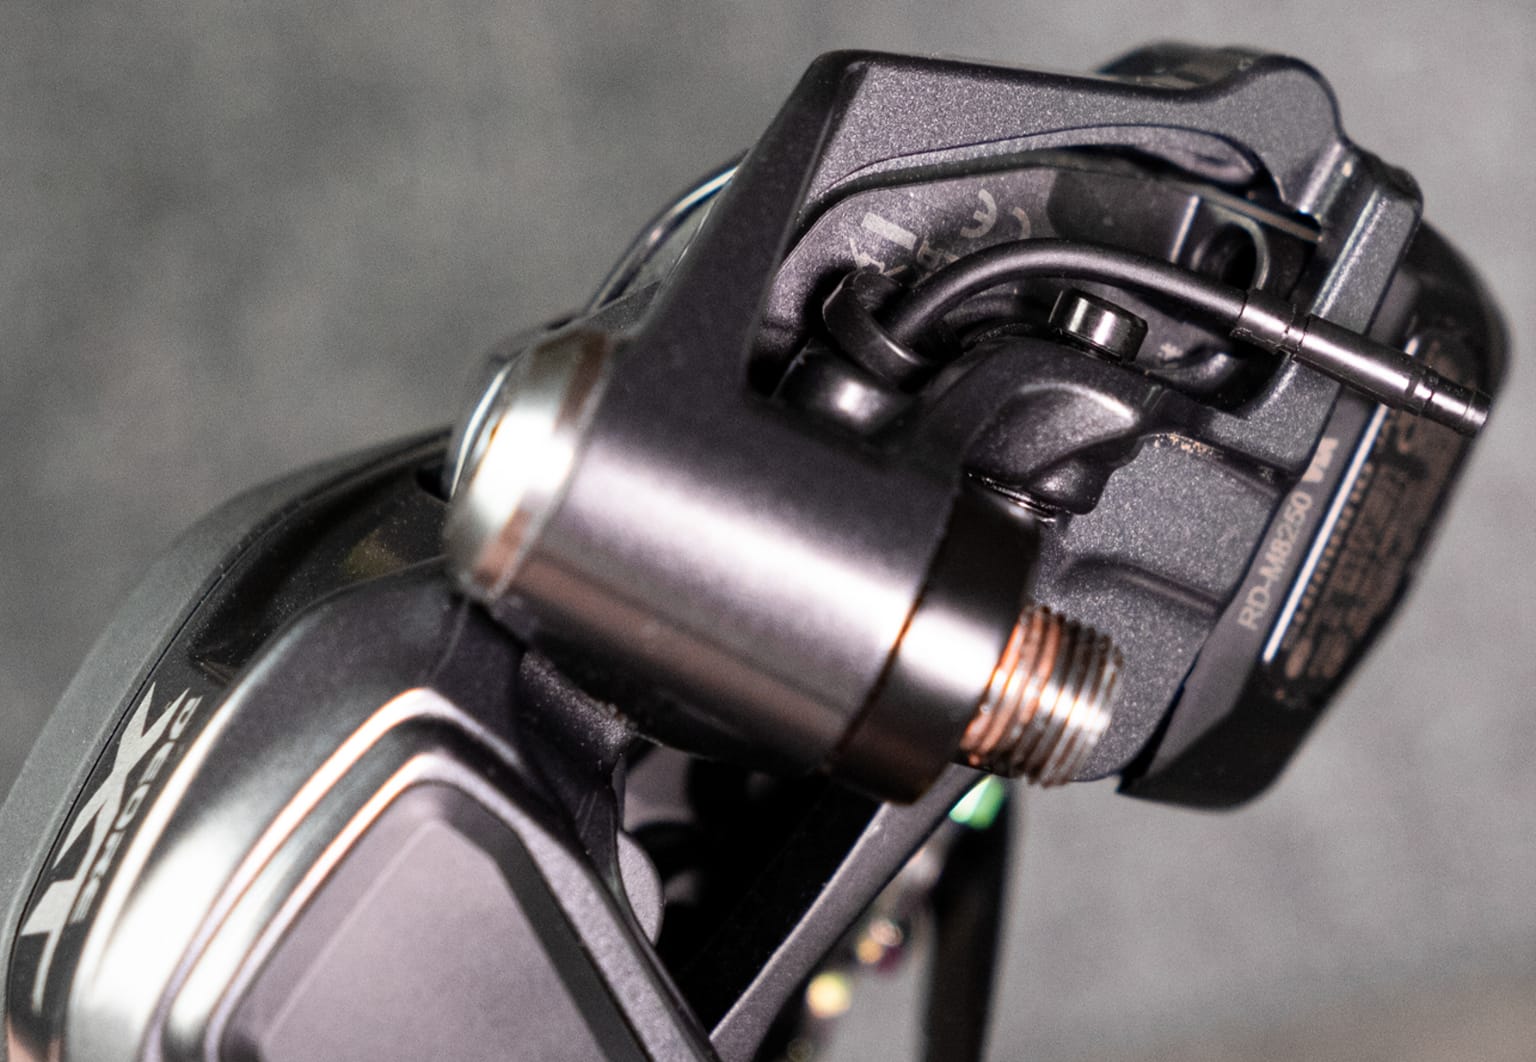
Disconnecting this wire has severed the connection between the battery and the derailleur, so don't be alarmed if it suddenly won't shift. It relies on the SM-PCE02 for power as long as it's connected to a computer.
Once you disconnect the tool and plug the wire back in, it'll shift as usual.
And no, this does not mean you can use the BT-DN300 battery to power these derailleurs. RidesOfJapan tried:
Using E-Tube Project with these derailleurs
So now that you've connected your derailleur to a computer, what do you do?
First, launch E-Tube Project V5. Click the connect button and wait for the SM-PCE02 to connect.
You'll see the connected rear derailleur, and also any shifters paired to it. E-Tube Project will ask you to press a button on each paired shift unit, so that it can be woken up. Doing so allows you to change not only the derailleur settings, but also the shifter button assignments:
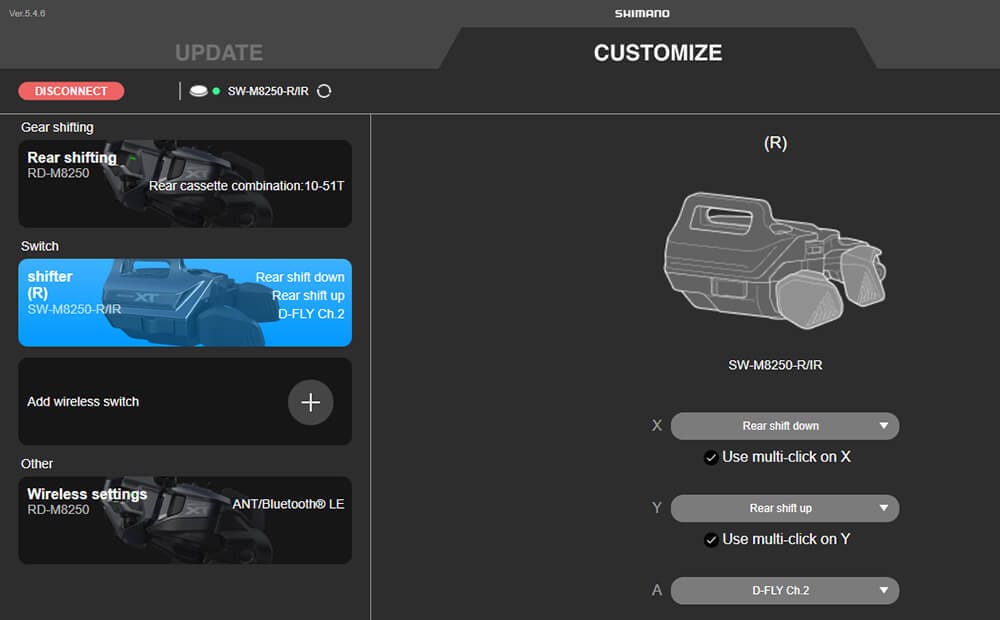
Don't have the shifters nearby? Just click that little skip button.
As for the wireless rear derailleur, you can change the passkey, as well as the cage length and cassette setting.
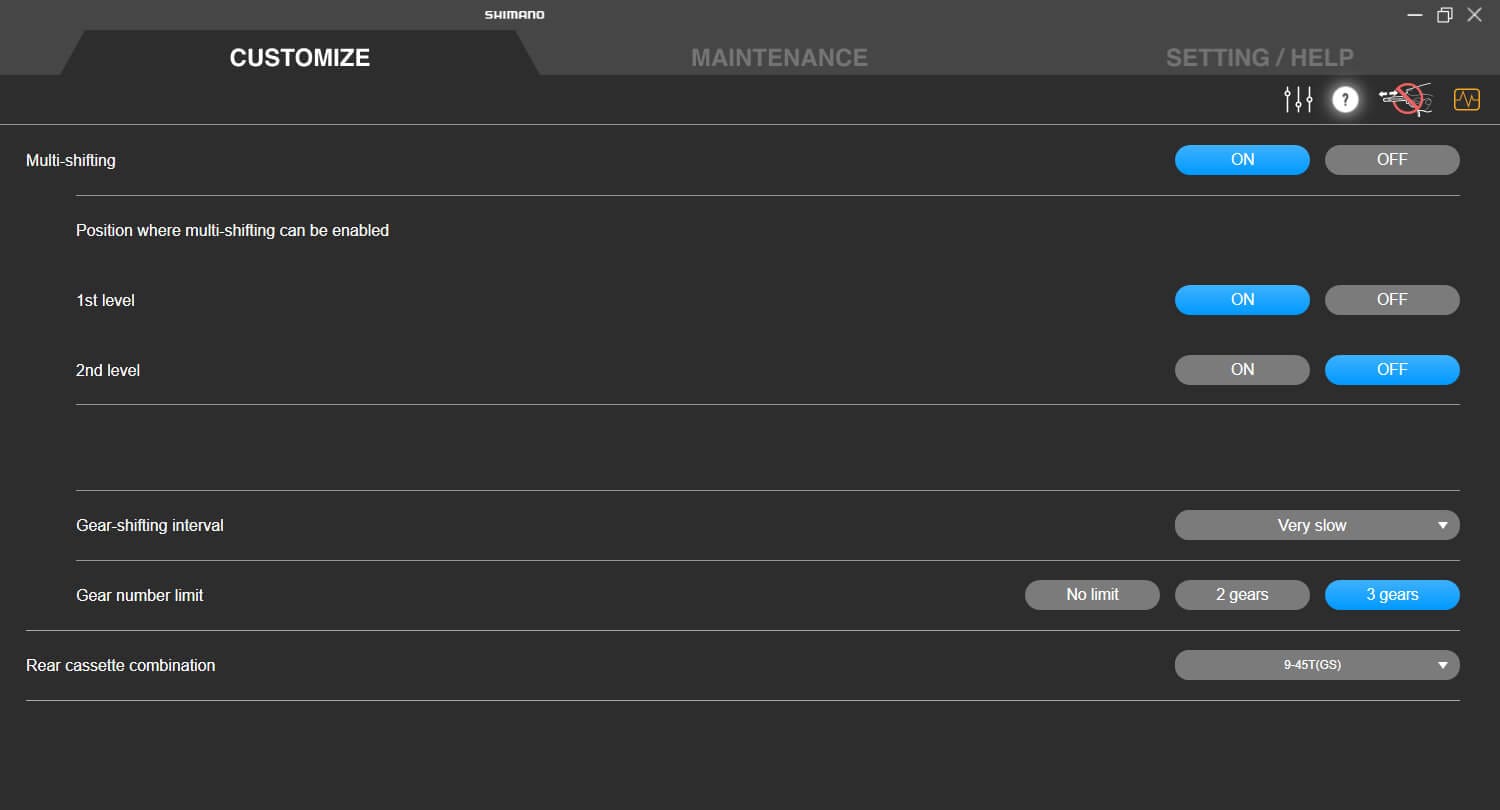
For derailleurs that support it, the rear derailleur cage can be changed from GS (medium cage) to SGS (long cage).
Finishing up
When you're done, be sure to use the disconnect button in E-Tube Project and close the application.
Then, disconnect the SM-PCE02, and reconnect the derailleur wire. The process is exactly the same as before, but in reverse order:
- Use the TL-EW300 to plug in the SD300 wire (it should snap into place)
- Slide the rubber port cover back on, make sure it's fully covering the port (I use a small screwdriver to help push the edges down).
- Place the derailleur cover back
- Refit the cover screw using your #2 hex key
- If you tightened the B-screw to get it out of the way of the rubber cover, be sure to set that up correctly again
That's it - the derailleur should now respond to shift commands again.
Anything I've missed? Any suggestions? Let me know in the comments below.

About the Author - BetterShifting Terry
If you want to support the site, consider using the site affiliate links, or buying me a coffee.
Buy me a CoffeeComments
Was this page useful? Any questions? Leave a comment below and I'll get right back to you.